

Filter Reviews
1 - 5 of 5 reviews
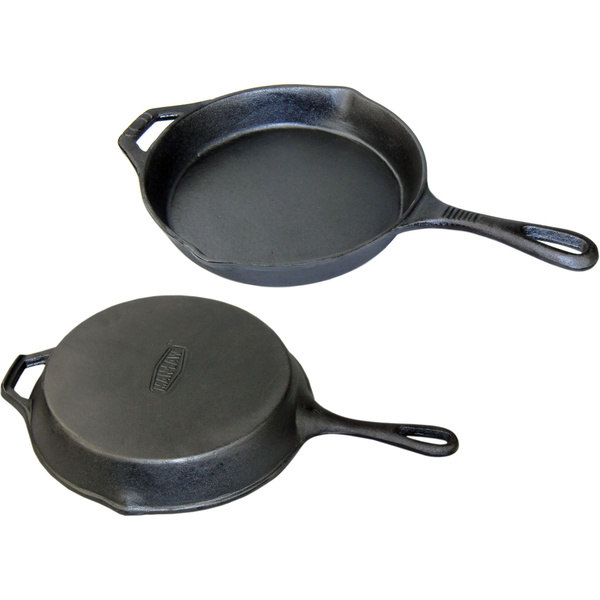
 Need to Reseason
If you're willing to put in some elbow grease, this is a great cast iron skillet for those large batches needing a 12-incher. But don't kid yourself - the so-called "seasoning" that is little more than paint on this skillet should be removed and a real seasoning placed on the pan. The base of the skillet also has a very rough texture, which doesn't work well when you're trying to create a smooth surface that's just as non-stick as the coated pans. So, what I did took a few days, but the effort was well worth the result. First, get rid of that coating that's on the skillet by putting on some kitchen gloves (rubber or nitrile) and putting on a very heavy coat of oven cleaner on the pan, inside and outside. Put the pan in a larger plastic bag (a kitchen trash bag works well) and let the pan sit in the bag for 3 days. After 3 days, glove up again and using newspaper or other medium, remove the glop that is the beginning of the original coating. Spray another liberal coat of oven cleaner on the pan, and put it back in the bag and let it sit another 3 days. After that time, glove up, remove the pan from the bag, wipe off the excess glop with newspaper or paper towels, and wash the pan thoroughly with dish soap and water. At this point, the pan is completely cleaned of that so-called "seasoning" and is down to bare iron. Dry thoroughly immediately, and then create a 50% solution of vinegar and water and fill up the pan. Let the solution soak in the pan for at least one hour, but not more than 3 hours. The acid in the vinegar will balance the lye (caustic, or base) in the oven cleaner. Next thing to do is break out an orbital sander and armed with the velcro-type sanding disks of the coarsest grit you can find that handles metal, go to work with the sander and get rid of the rough texture on the bottom of the pan. I was able to get the texture fairly smooth in about 20 minutes of pretty intense sanding. Use eye protection, because the sanding disks will throw off some sparks. You may want to sand the sides of the pan, but you'll need a different style of sander for that - I used a 4" square palm sander that worked well, but you won't need to get it as smooth as the bottom. When you're satisfied, again wash the pan thoroughly in dish soap and water and dry thoroughly. Any residual rust must be removed before you season the pan - use steel wool if necessary. For seasoning, use lard. Vegetable oil contains a sticky substance that doesn't work well. Put a sheet of tin foil on your bottom rack and crank up your oven to 500 degrees. Put your dry pan (no lard yet) in the oven and let it sit for an hour in that hot oven. Using extreme care, take the pan out of the oven and using an oven glove or other protection, paint the interior and exterior of the pan in a thin coat of lard and put it back in the oven, UPSIDE DOWN. The lard will smoke - this is normal. Turn the oven off and every 10 minutes, remove and repaint with lard, making sure to remove any pooling. It's better to use thin coats than a single thick coat. After 4-5 applications, the lard turns brown and forms a very nice coating on your pan that's just as good as the non-stick stuff. You can repeat the seasoning process to thicken the coating. Store your pans with a paper towel on the bottom to protect the surface and absorb the fat. Clean the pan after cooking while warm with salt, or if very gunked up, water and a plastic scrubby. Please note that seasoning does not last forever and should be repeated when needed, especially when the coating starts getting beat up or if you find it necessary to wash with dish soap and water.
- BROOKLYN
VERY NICE AND EASY TO COOK IN
Man Law Cast Iron 12-inch Skillet