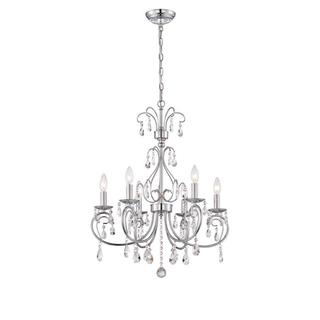
Stunning. Definitely not your mother's chandelier.
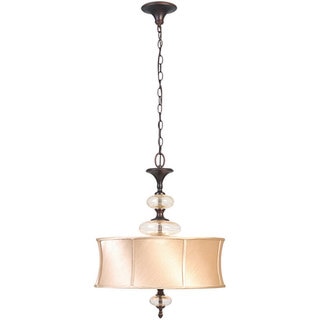
Love it. The sparkle of cut glass blends perfectly with the Old World look of the globe-shaped metal cage. Fabulous over my modern espresso stained table and bottle green Parsons chairs.
With the exception of combining the 6 pre-wired candle arms, I assembled the chandelier myself over 3 days. I'm 60, female, and have never assembled anything remotely similar to a light fixture. If you're patient and organized (see my tips below), you shouldn't have problems. Totally worth the effort. My electrician hung it on day 4 after delivery.
Some reviewers complained about having to assemble the crystal pieces. Customer assembly is necessary to (1) avoid damaging the crystals and (2) keep the price low. If pre-attached, the pendants and beaded swags could get cracked or scratched from rubbing against each other or the metal frame pieces during transit. Also, that would require more protective wrapping and a larger box, all of which would raise the price.
Tips and comments:
1. Disregard the written assembly instructions, period. Instead, look carefully at the product photos on Great Offer Stock and check the diagrams carefully. If you're not sure what you're looking at in the diagrams, use a magnifying glass. If you guess, you may wind up having to take it apart when you discover that you failed to include a piece or put a piece on backwards. Trust me: I speak from experience.
2. As you're unpacking, don't worry about the sheer number of pieces. Work on one component at a time like I did. You'll gather the needed pieces as you go and find that everything falls into place.
3. I had no idea how to assemble the electrical portion of the fixture, so I took the pieces to Home Depot for help (the 6 pre-wired arms and the base with 6 holes around the side). A friendly person in the Electrical dept. did it for me in about 5 minutes. Props to Home Depot.
4. I placed the assembled light fixture inside the cage BEFORE screwing in the last bars of the cage. Seemed like more trouble/risk of scraping to insert it between the bars of an assembled cage plus I wasn't sure that was even possible.
5. Assembling the cage is easy if you rest it on a large round bucket. I used an orange Home Depot bucket, which freed my hands to twirl the cage about and tighten screws with my right hand while holding it steady with my left.
6. All those crystal pendants. Each pendant needs to be attached to a small faceted bead with wire loops at each end. Put them on a large tray, turn on the TV and watch a Law & Order marathon. You'll be done before you know it.
7. I chose to attach the crystals AFTER the chandelier was hung by my electrician, to make it less heavy/easier to hang and avoid damaging the crystals. (This option may not be feasible for those with high ceilings.) Because he wasn't holding the entire weight of a crystal-loaded chandelier, he was easily able to straighten the electrical wire within the hanging chain. The electrical wire virtually disappears.
8. In the Great Offer Stock photo, the upper portion of the chandelier looks oddly empty. So I added a long beaded pendant between swags (3 beads + pendant). I had extra pendants because the long swags linking the 6 candle arms look nicer without a pendant hanging from the middle.
9. Minor product defect (speedily resolved by Overstock). The hole in one of the glass drip dishes was so tight that the candle sleeve wouldn't fit.